

WaveToGet App is available for your phone and tablet (iOS and Android). The app is FREE and easy to download. Simply click on the icon below depending on the type of your device. Or scan QR code below.
![]()
![]()

After installing the WaveToGet app on your phone, just click on the icon ![]() to open the app.
to open the app.
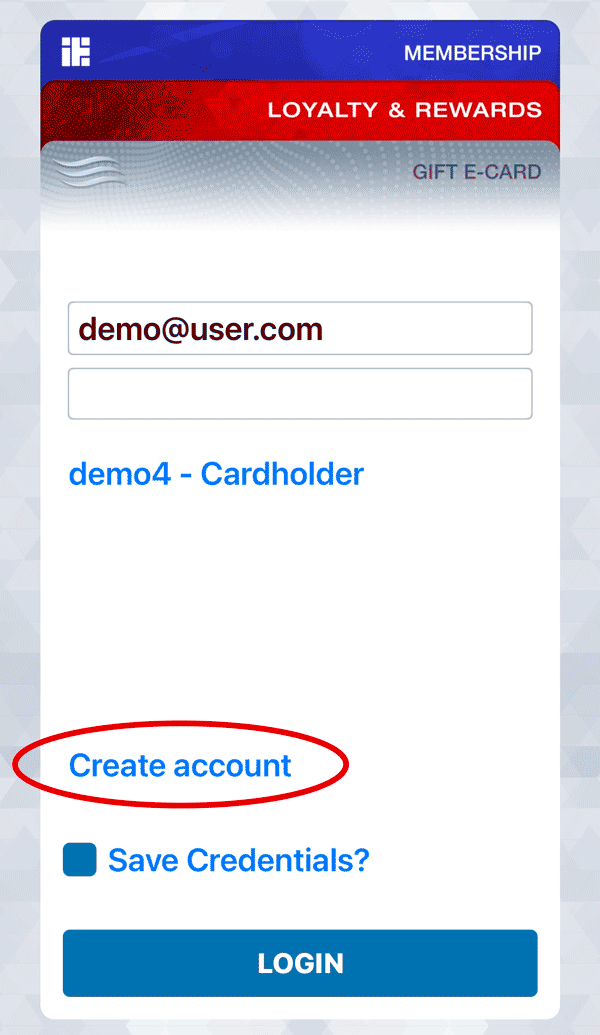
To create an account click the button “Create account” at the bottom.
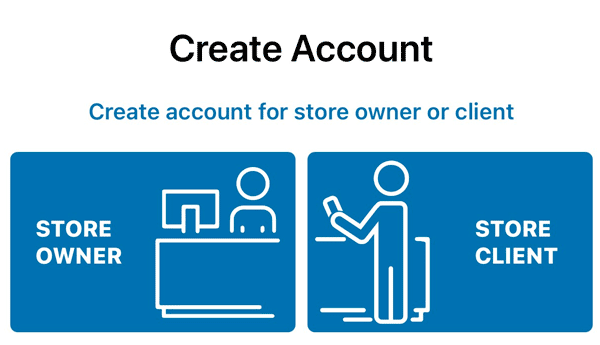
You will see two options: “Store Owner” (to the left) and “Store Client” (to the right). Choose the “Store Client” option.
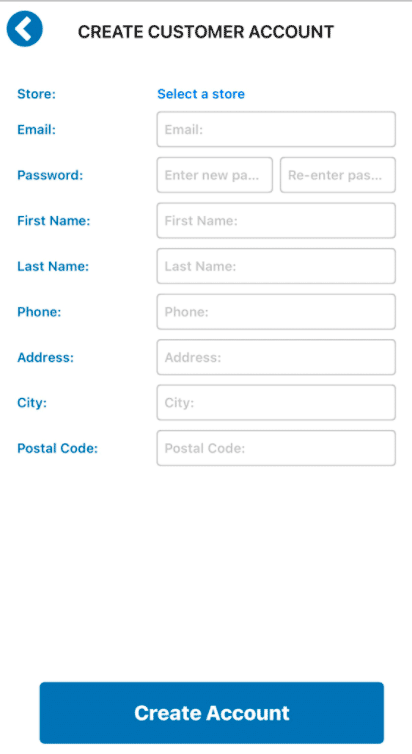
Now a page “Create Customer Account” will appear. Here you need to choose a store you are planning to use the app for. You will see a button “Select a store”, fill in the information about yourself: Email, Password, First Name, Last Name, Phone, Address, City, and Postal Code. After you have done all the steps, you need to press the “Create Account” button at the very bottom.
“Account created” notification will pop up, press “OK”. Now you are ready to log in with your credentials!
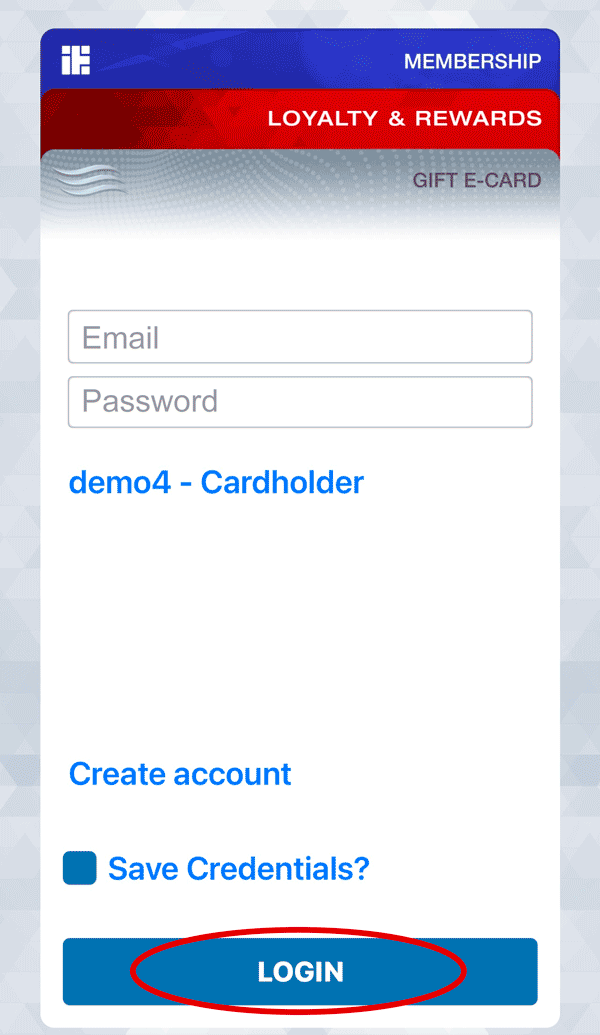
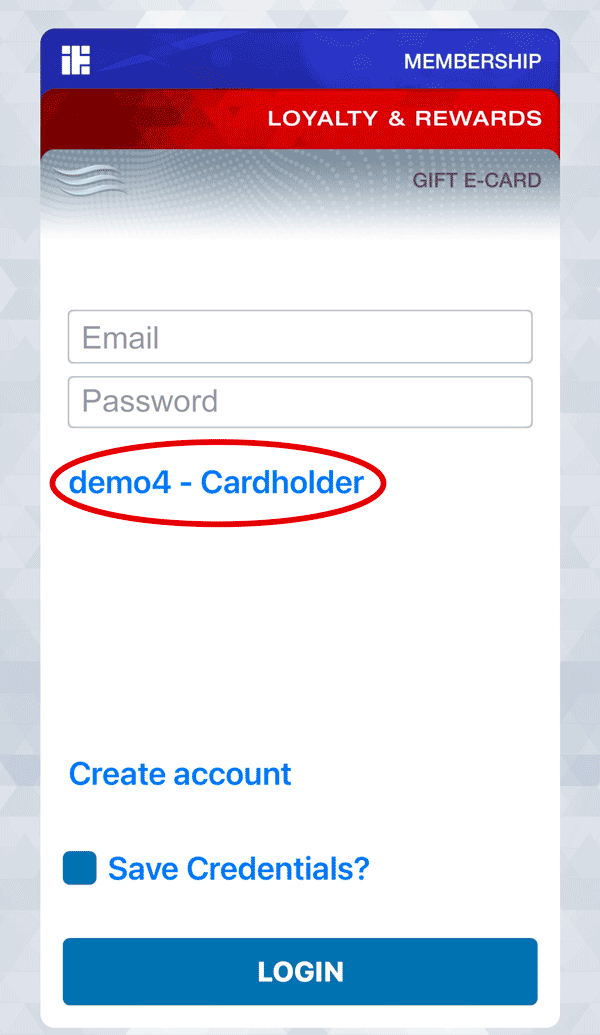
To log in enter your email address and password, then click “LOGIN” button.
You can create multiple accounts for different stores with the same email address and password. To choose a store click the blue “Name of the store-Cardholder” button below the password and select the one you need.
Watch a tutorial video
(1st of 3):
- Wavetoget App installation;
- Create new account;
- Login.
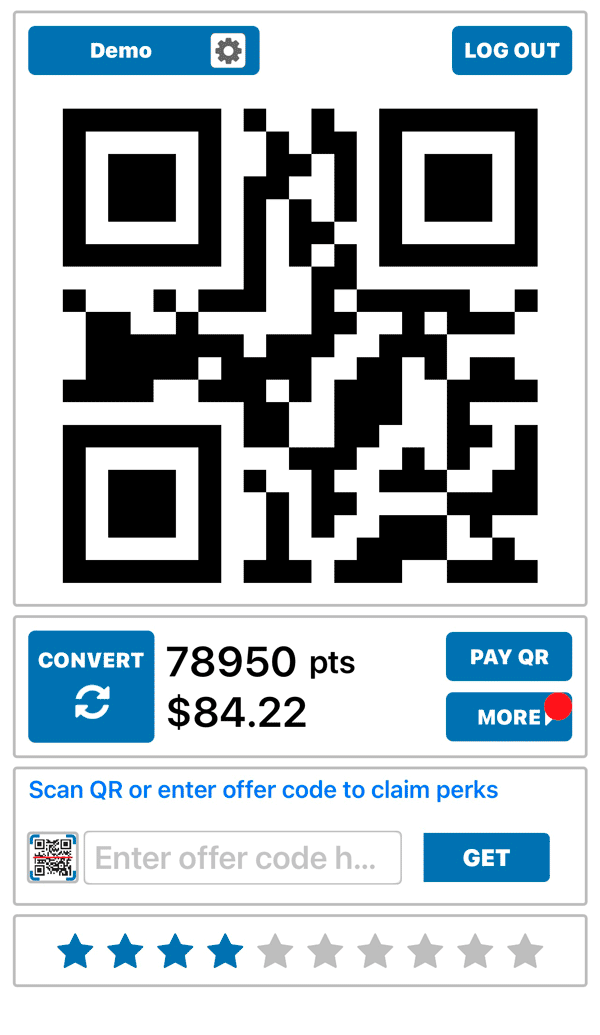
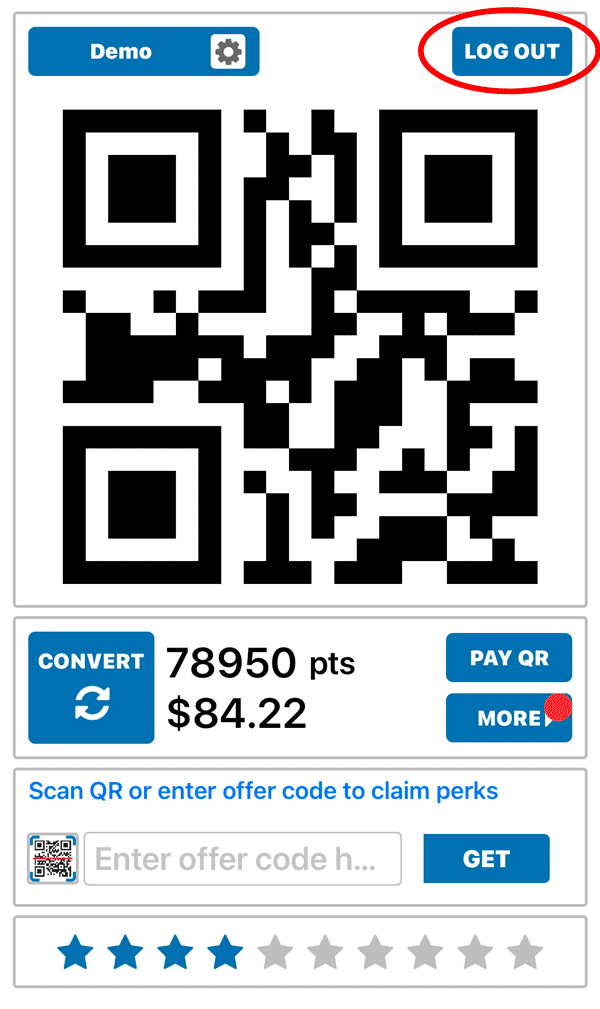
After you log in, you’ll be on a Home Page. In the middle of the page, you will see your Personal QR-code, which the store can scan to see your account information when you visit them or they can find you by phone number.
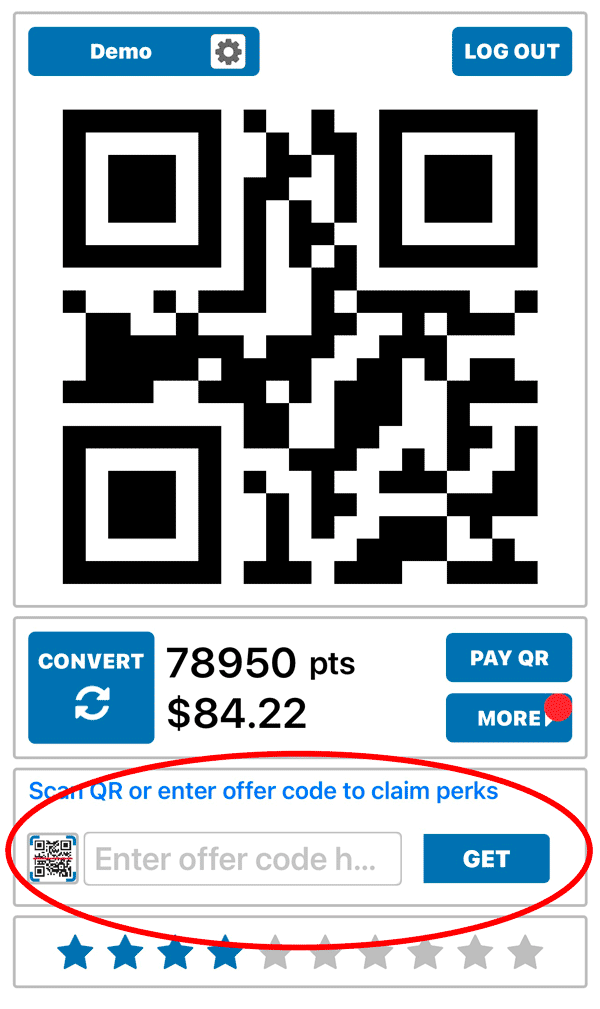
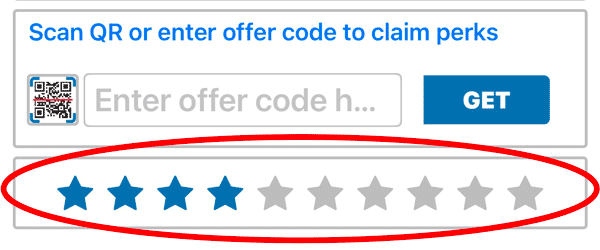
In the third block of the Home Page, you will see “Scan QR or enter offer code to claim perks”. Below you can find QR-scanner (to the left) to add points (or virtual dollars) to your account. Or you can manually enter the offer code to get points.
Offer codes are provided by the store for example in their blogs or at their location. After you enter the code, click “GET” button. And the points or virtual dollars will be displayed on your Home Page below your Personal QR-code.
Also, the store can also add points or dollars to your account manually at their end.
Later when you have enough points the store can redeem your points or dollars so you can get gift cards or any other rewards they offer.
As it was mentioned before, you can check the balance of your account (the number of points and dollars collected) below your Personal QR-code.
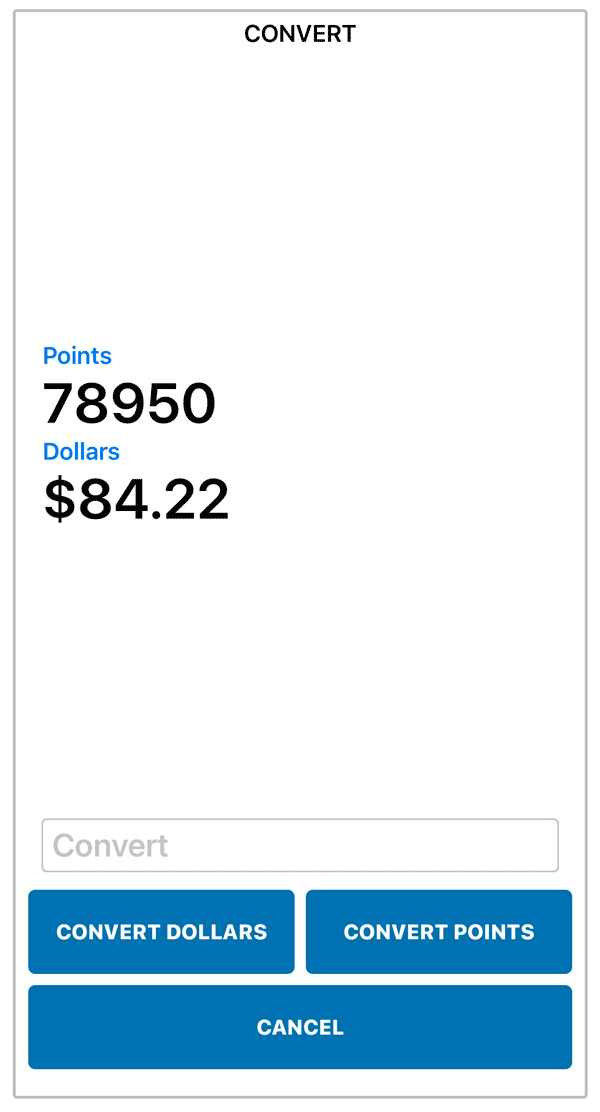
Also, have an opportunity to convert dollars into points and vice versa. To the left of your balance, there is a “CONVERT” button.
To convert collected points click the “CONVERT” button,
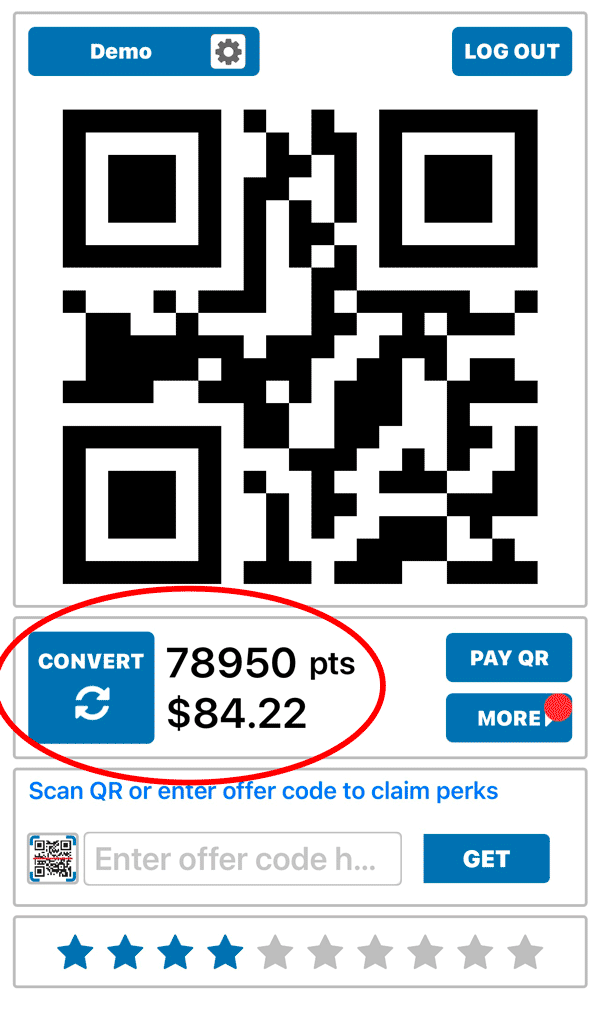
enter the amount you want to convert to dollars, then tap “CONVERT POINTS” and the amount entered will be automatically converted to dollars allowing you to spend it on goods or services later on.
To convert collected dollars, enter the amount you want to convert to points, then tap “CONVERT DOLLARS” and the amount entered will be automatically converted to points.
Another interesting function is the ability to pay with QR-code. To make a purchase at the store simply click the “PAY QR” button to the right of your account balance.
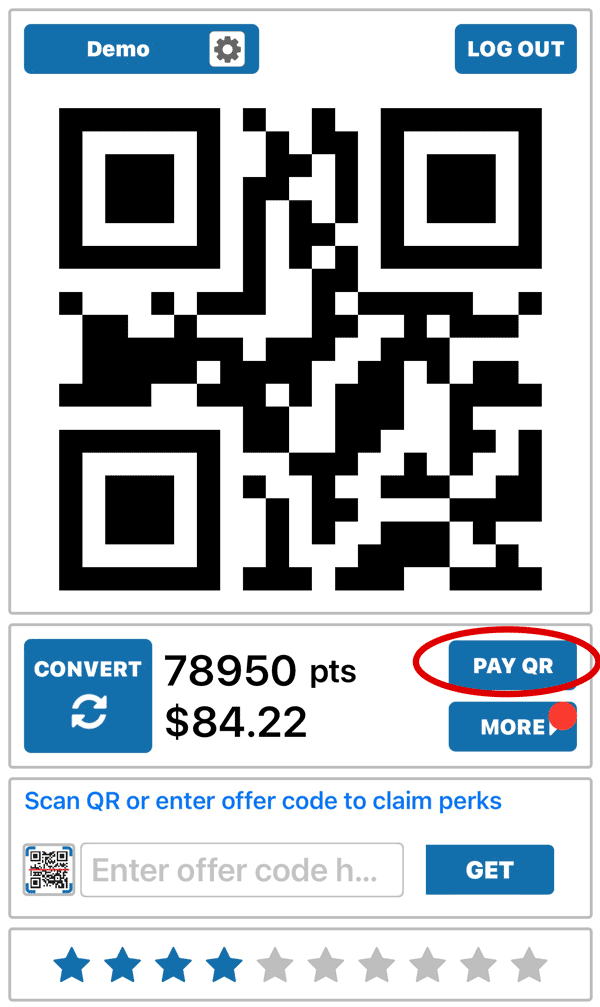
A phone camera will show up where you can point it to QR code to redeem points/dollars and purchase a product.

At the very bottom of the Home Page, you will notice stars. This is a Rewards Chart, after a certain amount of visits or purchases at the store, you will collect stamps that will allow you to get eligible rewards.
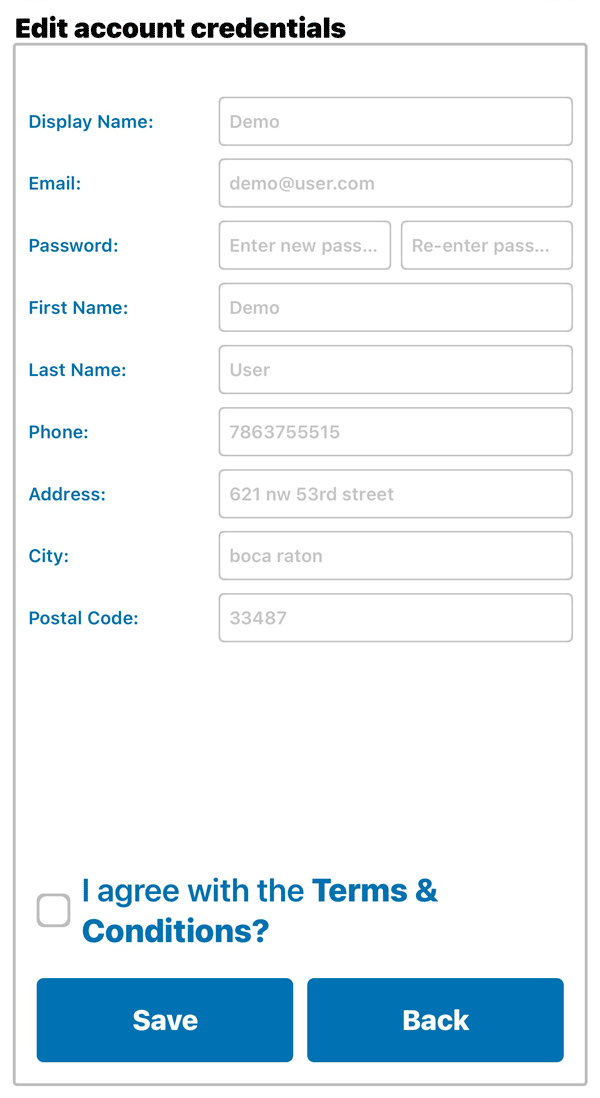
Also, there is a button with your name and settings sign in the left top corner. To change your information such as Email, Password, First Name, Last Name, Phone, Address, City, and Postal Code, simply click the button, change necessary information, check the “I agree with the Terms and Conditions?” box, and then click “SAVE” button. For no changes click “BACK” button.
To log out, go to Home Page and click the “LOG OUT” button in the top right corner.
Watch a tutorial video
(2nd of 3):
- Home page;
- Getting perks and rewards;
- Converting points/dollars;
- Pay with QR;
- Rewards;
- Settings;
- Log out.
Under the “MORE” button we have the “REWARDS CHART”, “MEMBERSHIP”, “REDEEMABLE”, “NOTES” sections. The “REWARDS CHART” section shows you how many visits or purchases at the store are left to get eligible rewards.
In the “MEMBERSHIP” section you can check when your membership expires and what privileges you have with your membership.
The “REDEEMABLE” section reflects how many points you have to redeem to get eligible rewards.
In the “NOTES” section you can read notes from the store.
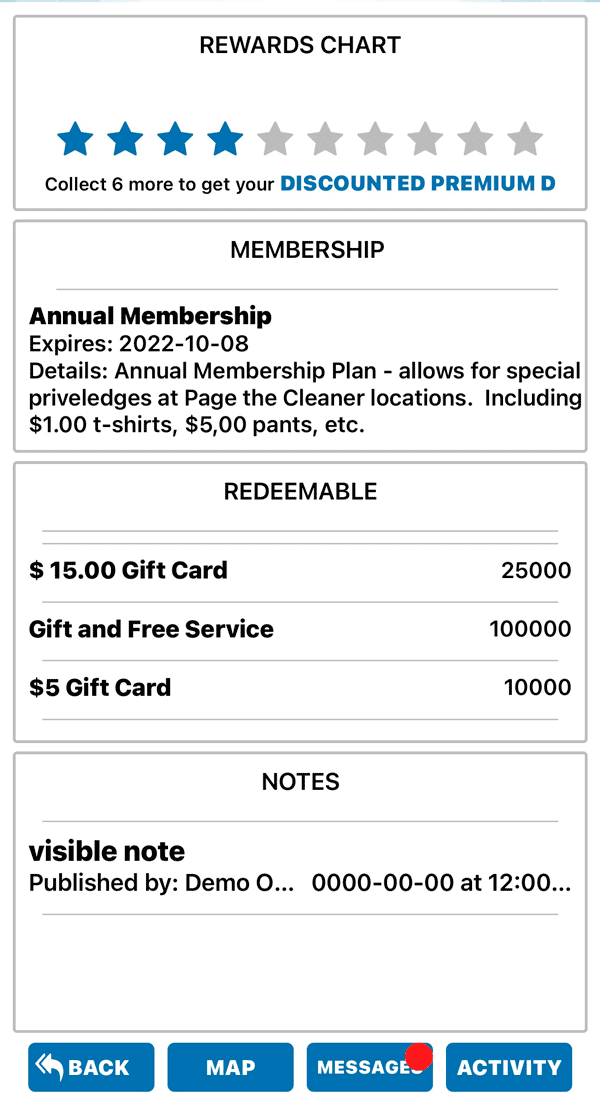
If you click the “MAP” button, it will direct you to the exact location of the store.
Under “MESSAGES” you can check mail sent to you from the store.
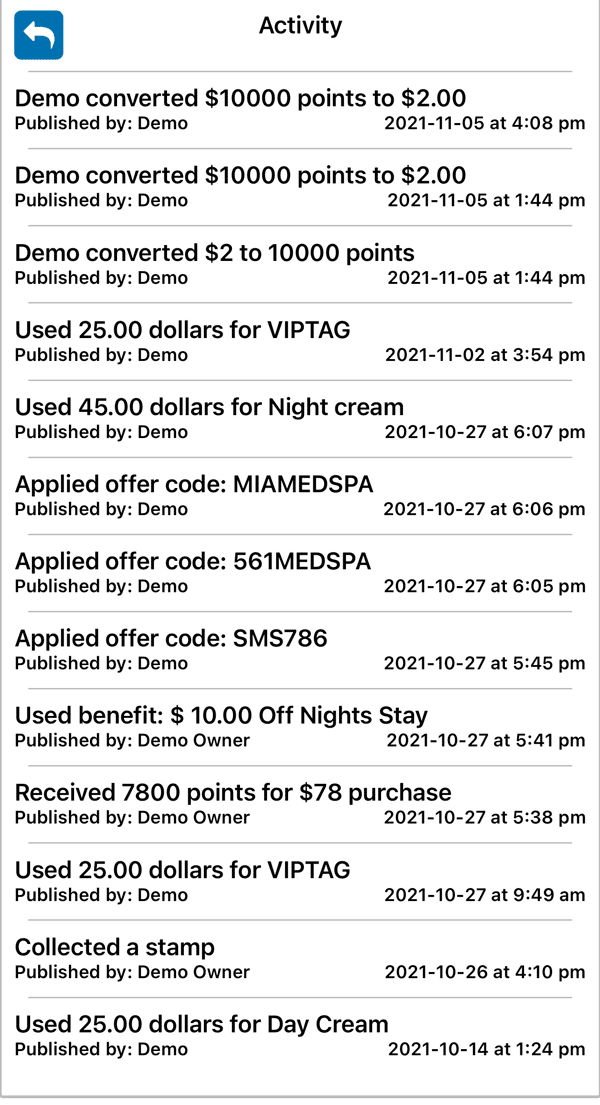
To check your activity or account history such as points or dollar additions, redeemed goods, etc., simply click the “ACTIVITY” button.
Watch a tutorial video
(3rd of 3):
- More page;
- Map;
- Messages
- Activity.