

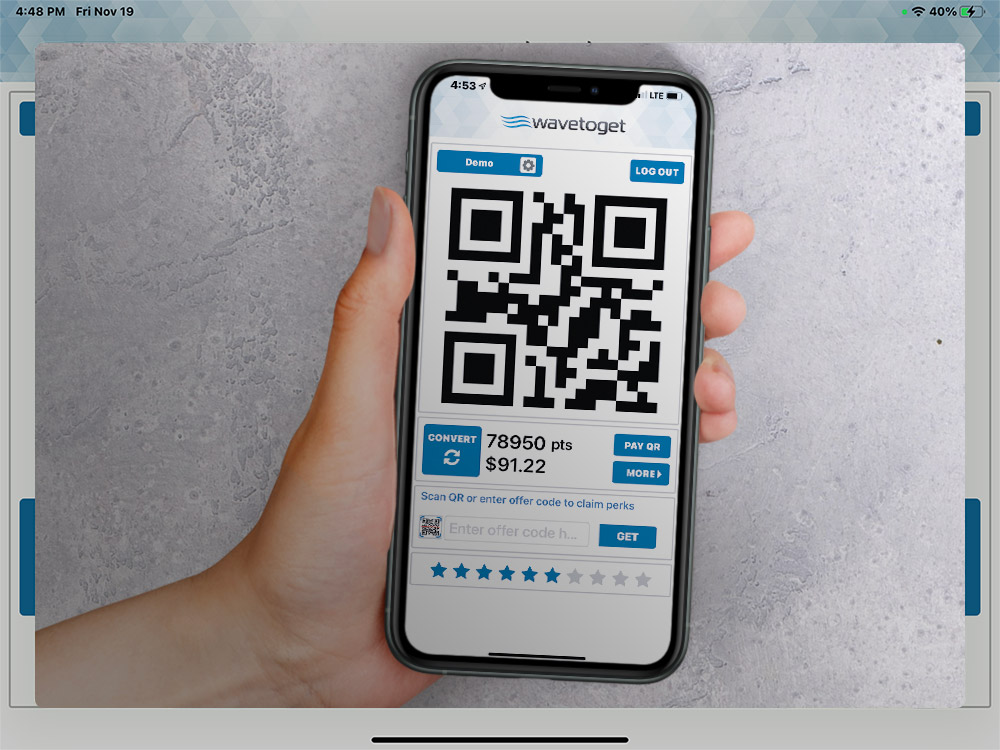
WaveToGet App is available for your phone and tablet (iOS and Android). The app is FREE and easy to download. Simply click on the icon below depending on the type of your device. Or scan QR code below.
![]()
![]()

After you fill out the form on our website, our specialists will contact you.
Then you will have an option to choose a plan. After you are done with the payment, our team will create a personal profile for your business and will provide you with a login and password.
After installing the WaveToGet app on your tablet or phone, just click on the icon ![]() to open the app.
to open the app.
To create an account click the button “Create account” at the bottom.

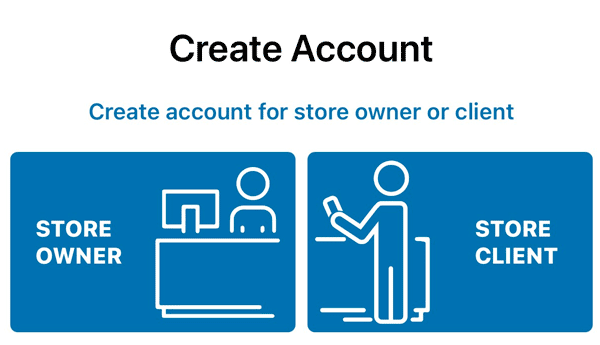
You will see two options: “Store Owner” (to the left) and “Store Client” (to the right). Choose the “Store Owner” option.
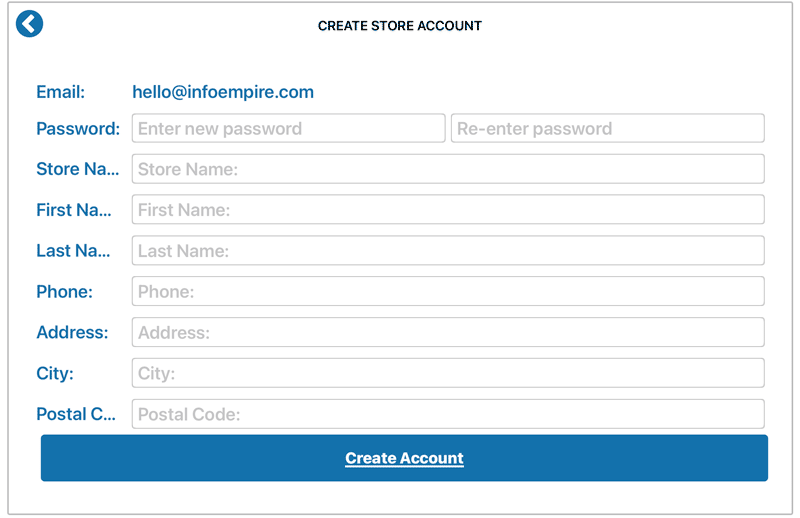
Now a page “Create Store Account” will appear. Here you need to fill in the information about yourself: Email, Password, Store Name, First Name, Last Name, Phone, Address, City, and Postal Code. After you have done all the steps, you need to press the “Create Account” button at the very bottom.

“Account created” notification will pop up, press “OK”. Now you are ready to log in with your credentials!

To log in enter the login (email address) and password our team provided, then click “LOGIN” button.

Watch a tutorial video
(1st of 3):
- Wavetoget App installation;
- Create new account;
- Login.
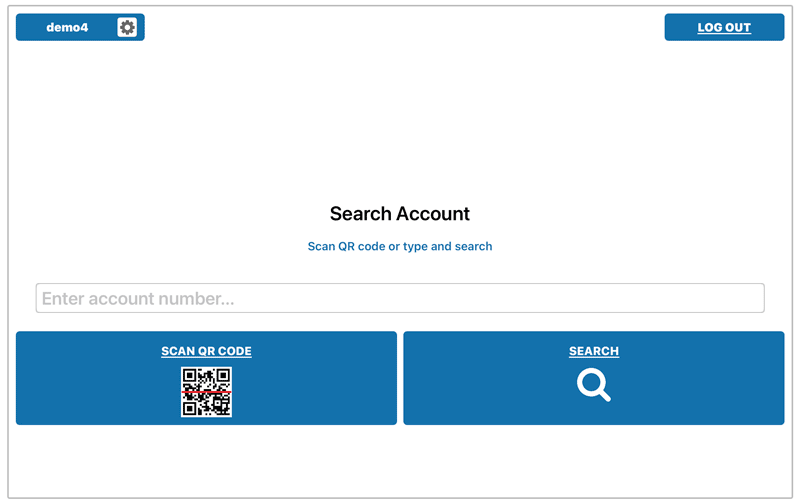
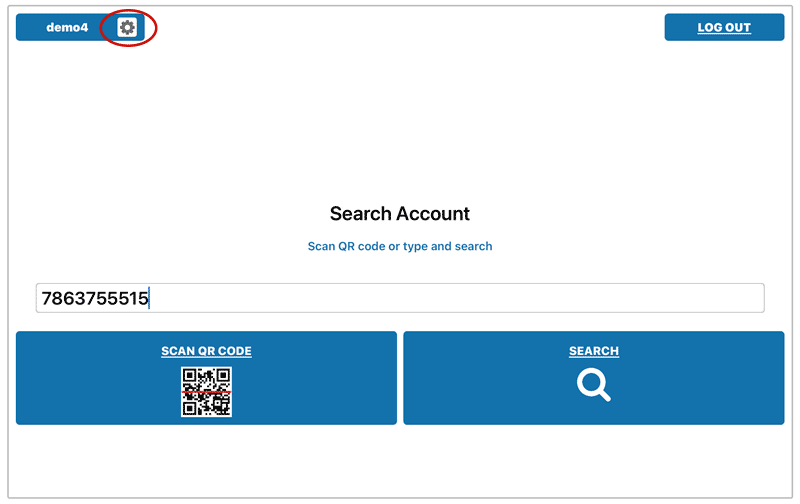
You will see the “Search Account” option. To find a client profile click the “SCAN QR CODE” button and scan the QR code on their app. OR search for them by phone number. Simply enter the phone number in the “Enter account number” box and click the “SEARCH” button.
When you log in, you will see the button with your name and settings sign in the left top corner.
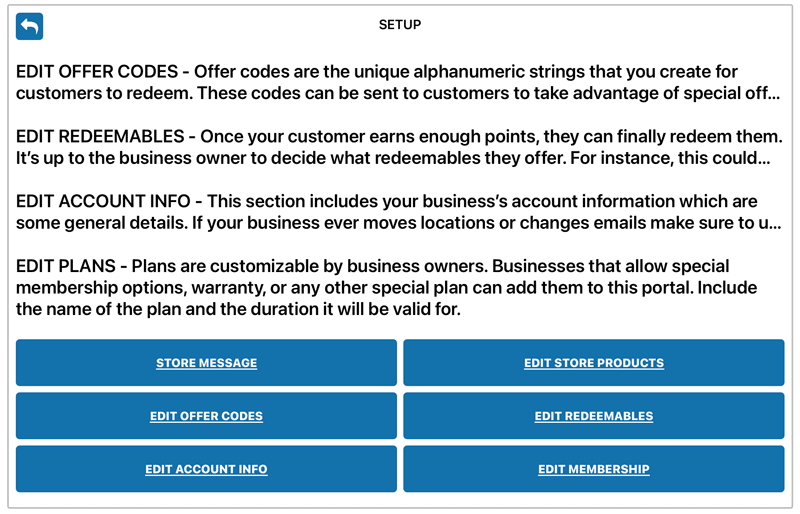
Here you have your discount, plans, product, and redeemable management center. You will have the following editable options: “Store Message”, “Edit offer codes”, “Edit your account info”, “Edit store products”, “Edit redeemables”, and “Edit membership”.
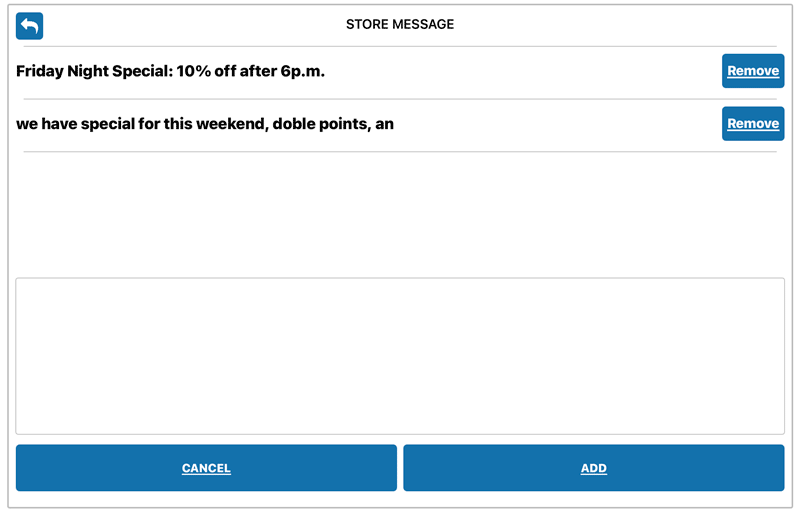
You can create a message visible to all your clients. Click the ”Store Message” button, type a new message and click “ADD”.
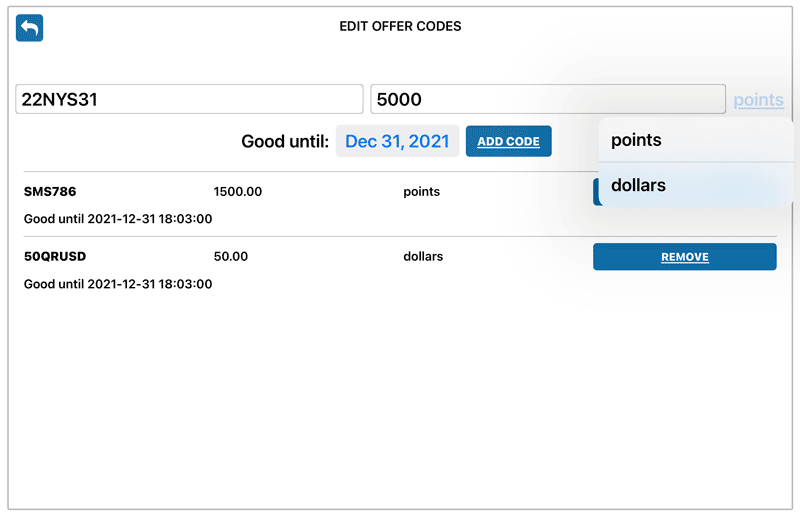
To edit your offer codes that your customer can use to add points, press the “Edit offer codes”, then create a Code and enter the number of points or dollars you want to offer for this code. To switch from points to dollars, click the blue “points” or “dollars” word, and select the one you need. Below choose the date the offer code is good until. Then click the “ADD CODE” button. In order to delete the offer code, press the “REMOVE” button right next to it.
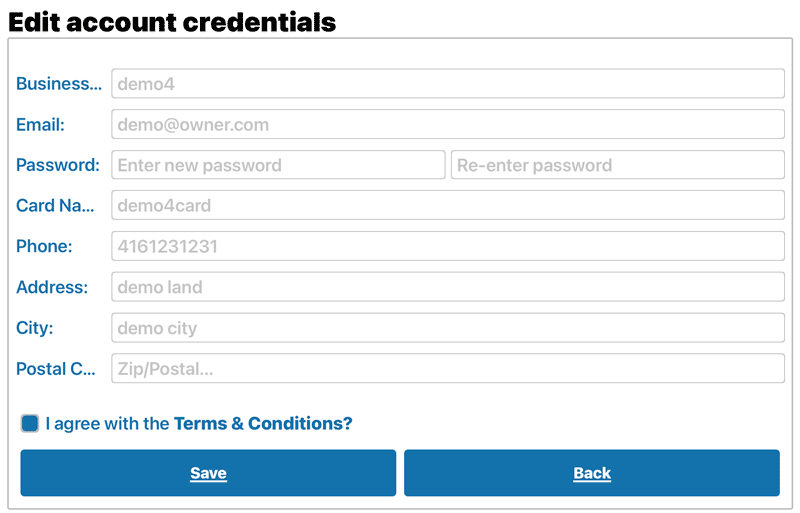
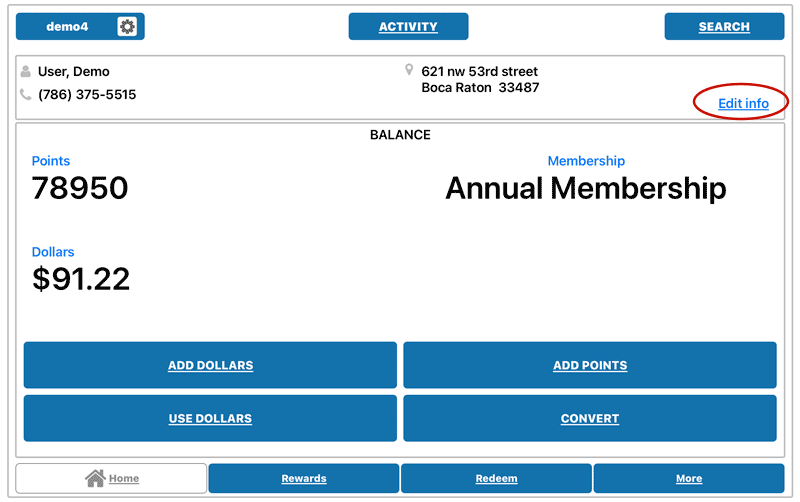
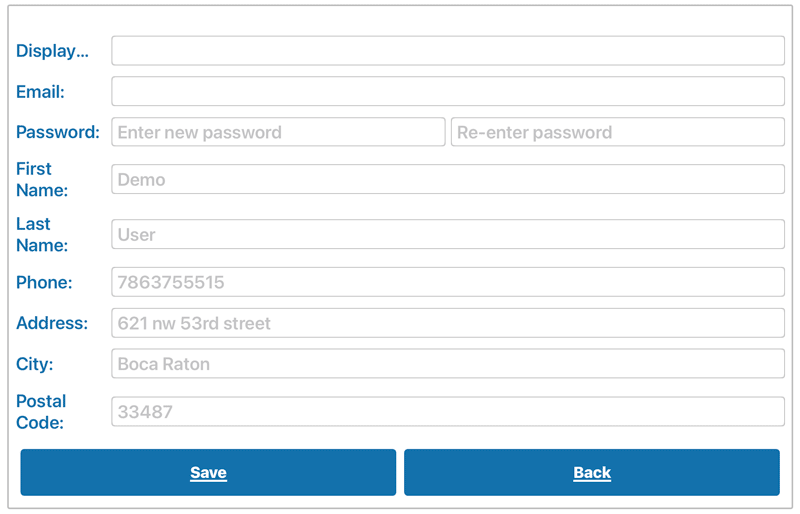
To “Edit your account info” your information such as Email, Password, First Name, Last Name, Phone, Address, City, and Postal Code, simply click the button, change necessary information, check the “I agree with the Terms and Conditions?” box, and then click “SAVE” button. For no changes click “BACK” button.
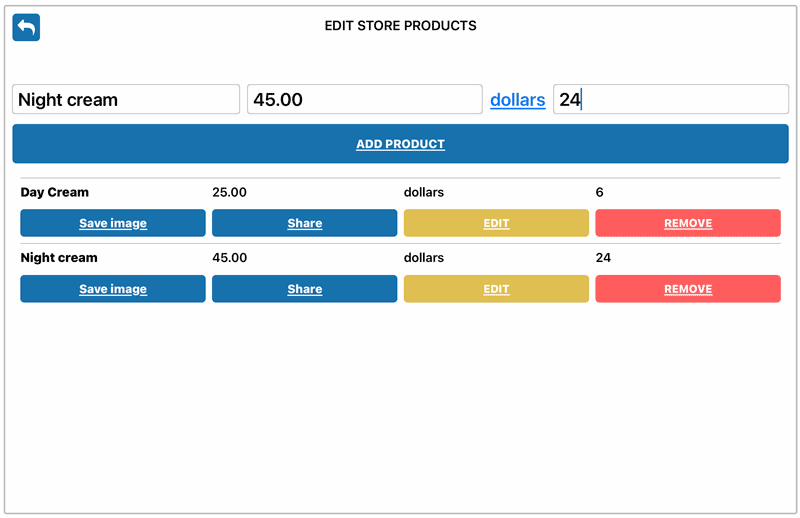
To add products in stock that are available for QR code purchase through the app, go to “Edit store products”. Enter the name of the product, the amount of points or dollars needed to buy the product (the “price”). To switch from points to dollars, click the blue “points” or “dollars” word, and select the one you need. Then add the quantity of the product and click the “ADD PRODUCT” button. You will see the list of products below. You can always edit the “price” and quantity of the product by clicking the “EDIT” button. To save the QR code of the item, you can press the “Save image” button. Or you can share the QR by clicking “Share”. In order to delete the product, press the “REMOVE” button.
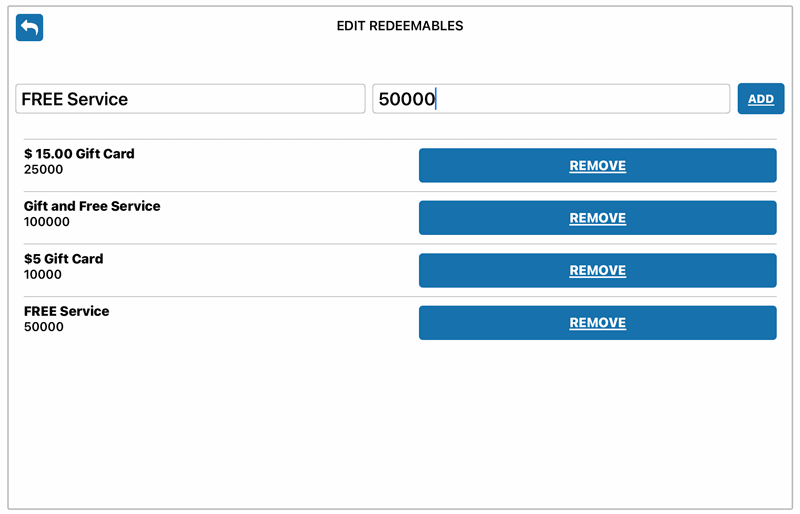
In this section, you can create gift cards or any other rewards you choose that your clients can get if they have enough points to redeem. To add rewards, enter the name of the reward or a gift card in the “Name” box and the amount of points needed to get it in the “Cost” box, then click the “ADD” button. You are able to remove any reward from the list by clicking the” REMOVE” button.
All membership plans are customizable. To create your membership plan go to “Edit membership”, enter the name of the membership and the duration it will be valid for, click the “ADD” button. To add more information on the membership plan press the “EDIT” button next to the plan.
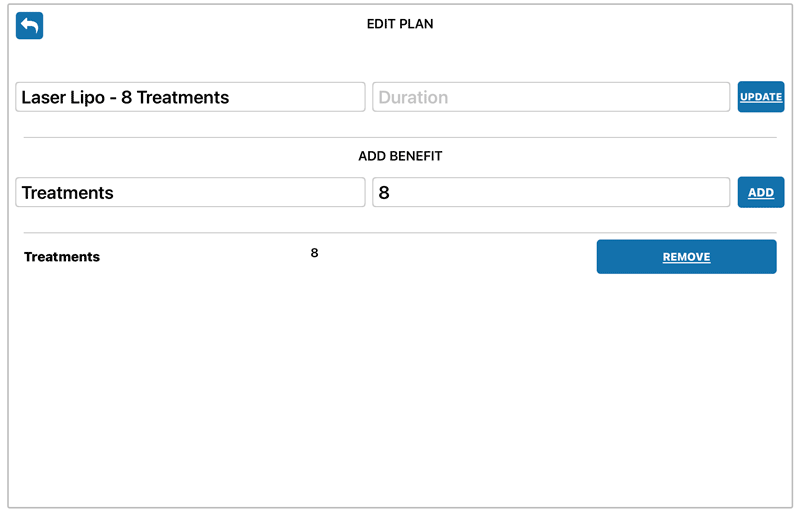
You can edit the name of the plan and the duration. Under ADD BENEFIT create the description of the benefit that the plan includes and the quantity. Press the “ADD” button. To remove some benefits from the membership plan simply click the “REMOVE” button. If you want to delete a membership plan go back to the “EDIT PLANS” page and press the “REMOVE” button next to the plan.
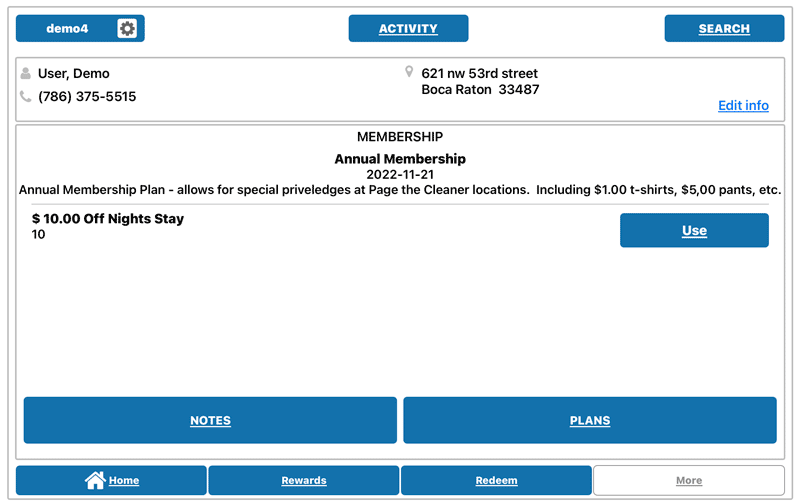
Under the “MORE” button we have the “NOTES” and “PLANS” sections. You can add notes about your clients, their preferences, allergies, etc. The notes may be visible to your clients or hidden. Toggle the eye icon button if you want the notes to be not visible to the client. Enter note text and click the “ADD” button. Under “PLANS” you have the ability to manage your client’s membership or subscription plans. To provide a membership option for your client, simply choose the correct option and click the “ENROLL” button. Once you activate the membership it will display on the MEMBERSHIP page as well as the membership information, expiry date, and benefits will be shown. After the client uses one of the membership benefits, press the “Use” button, and the number of benefits will be reduced automatically until he/she runs out of those benefits.
Watch a tutorial video
(2nd of 3):
- Settings;
- Features.
After you log in and find a client’s profile you will be directed to a Home Page.
This section allows you to check and manage your client’s information, balance, membership, and rewards.
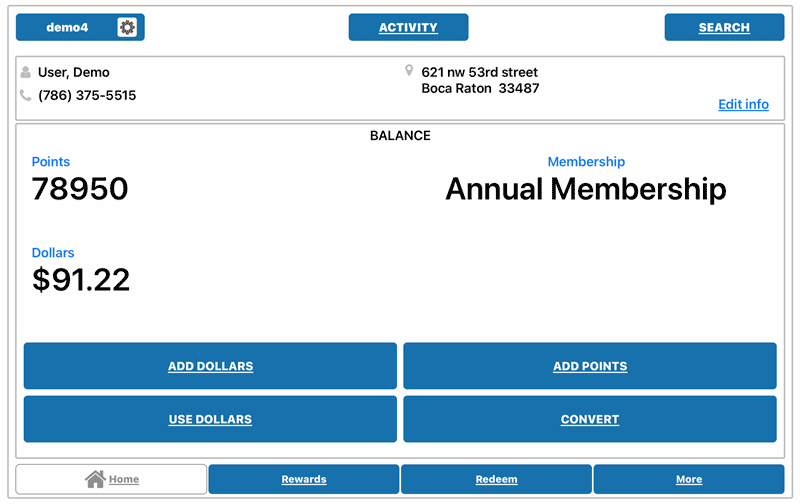
Home Page shows how many points and dollars the client collected. Also, there is information about the membership.
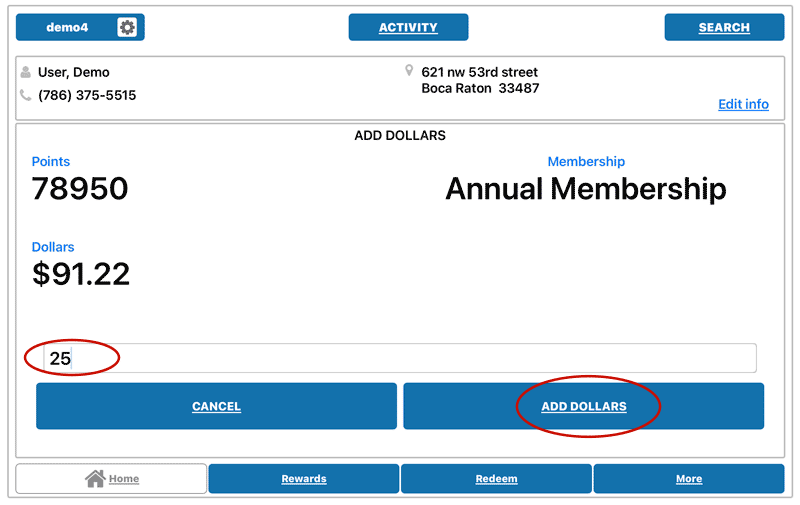
To add dollars to your client’s account, simply press the “ADD DOLLARS” button. Then enter the amount you wish to add to the account and click the “ADD DOLLARS” button again.
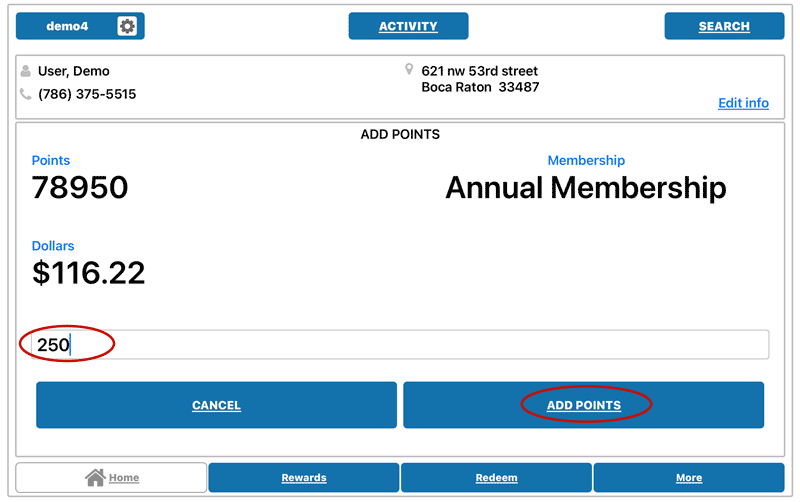
To add points for a client’s purchase click the “ADD POINTS” button, enter the amount of dollars the client spent, and tap “ADD POINTS” again. This amount will automatically be converted to points and displayed on your client’s account.
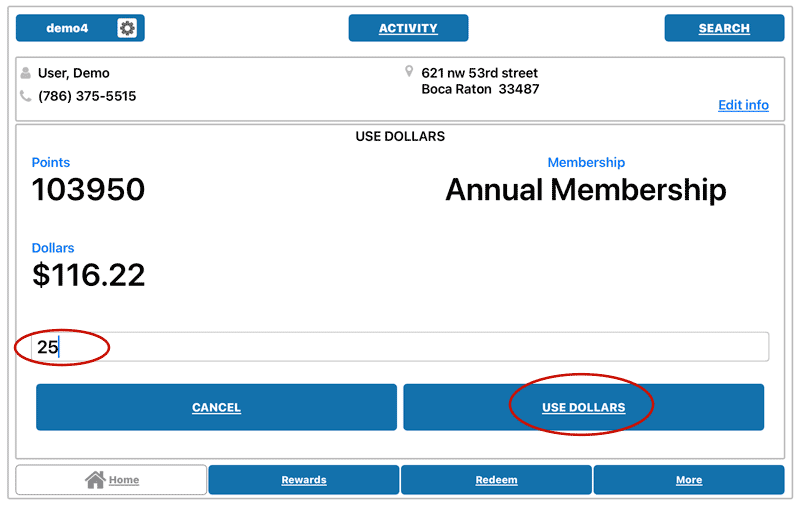
To use dollars, when a client would like to spend their dollars towards a purchase or discount, press the “USE DOLLARS” button, enter the amount and click “USE DOLLARS” again.
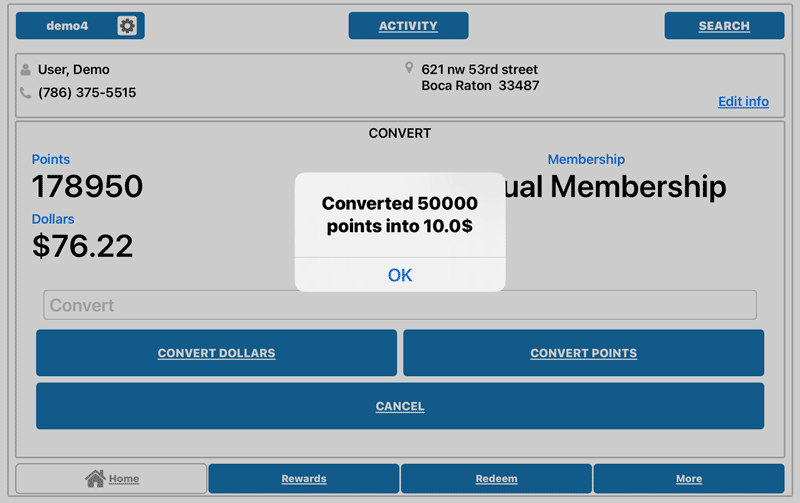
To convert your client’s collected points into dollars or dollars into points, tap the “CONVERT” button and enter the amount of points or dollars that you want to convert, then click “CONVERT POINTS” to convert points into dollars or “CONVERT DOLLARS” to convert dollars into points. The entered amount will be automatically converted to dollars or points accordingly allowing your customer to spend it on goods or services later on.
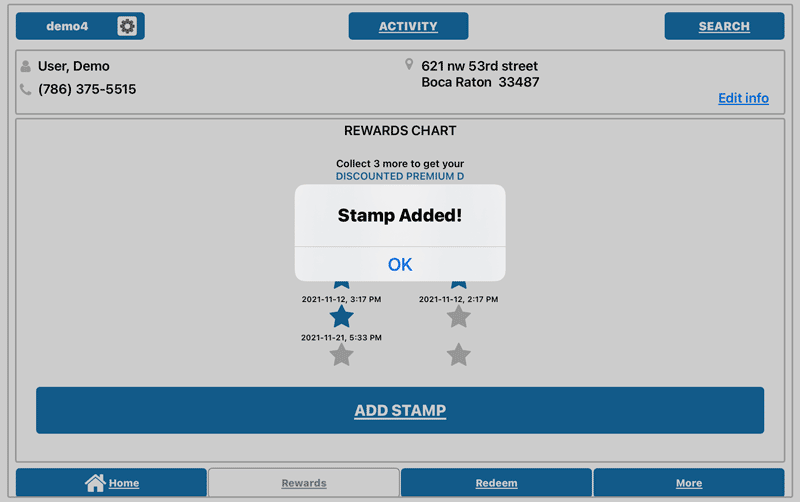
Now, let’s proceed to the rewards chart. At the bottom of the screen, you will see the “REWARDS” button. In this section, you can add stamps to your client’s account after each purchase or visit. When your customers make a certain number of purchases/visits, he/she will get enough stamps to get eligible rewards. To add a stamp click the “ADD STAMP” button.

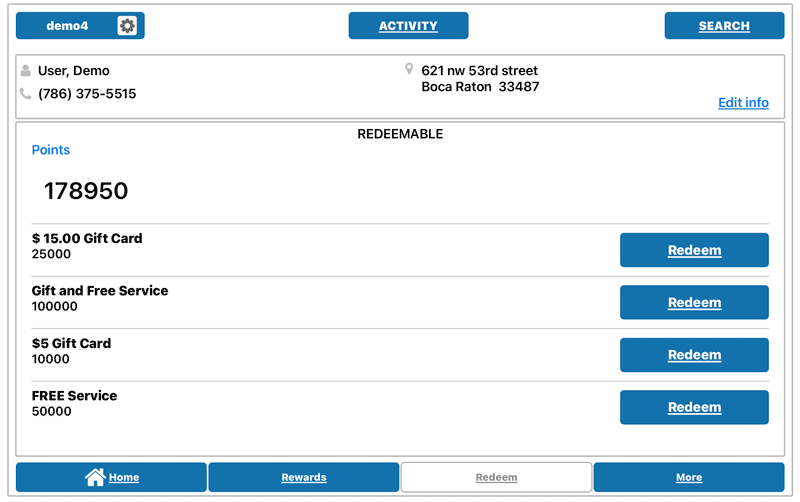
The “Redeem” section is right next to “Rewards”. In this section, you can convert your client’s points to gift cards or any other rewards you create. Select the reward they choose and press the “Redeem” button. If there aren’t enough points, the points button will be inactive. As soon as you click the redeem In the top left corner of the Home Page, there is a “SETTINGS” button that will bring you to the Settings Menu.
Under the “MORE” button we have the “NOTES” and “PLANS” sections. You can add notes about your clients, their preferences, allergies etc. The notes may be visible to your clients or hidden. Toggle the eye icon button if you want the notes to be not visible to the client. Enter note text and click the “ADD” button. Under “PLANS” you have the ability to manage your client’s membership or subscription plans. To provide a membership option for your client, simply choose the correct option and click the “ENROLL” button. Once you activate the membership it will display on the MEMBERSHIP page as well as the membership information, expiry date, and benefits will be shown. After the client uses one of the membership benefits, press the “Use” button, and the number of benefits will be reduced automatically until he/she runs out of those benefits.
In the top left corner of the Home Page, there is a “SETTINGS” button that will bring you to the Settings Menu.
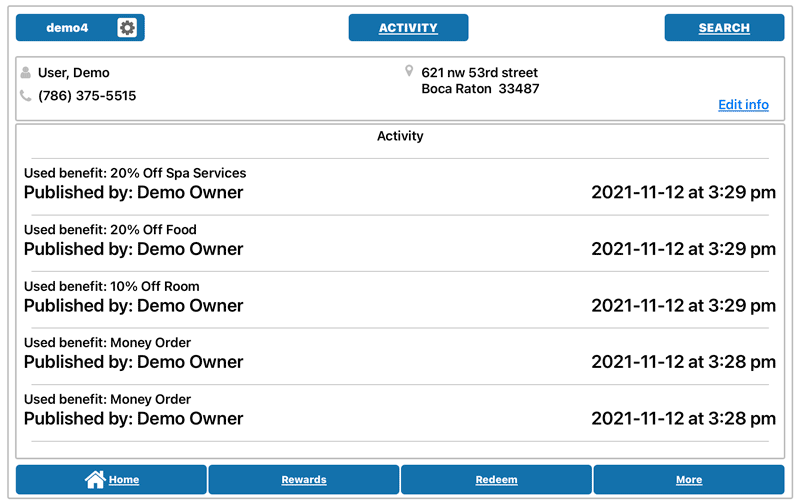
To check the activity or account history of the client such as points or dollar additions, redeemed goods, etc., press the “ACTIVITY” button in the top middle part of the screen.
To return to the Search Account page simply click the “SEARCH” button in the right top corner to find another customer.
Watch a tutorial video
(3rd of 3):
- Home page features.